|
Popcorn Wagon | ||
|---|---|---|---|
|
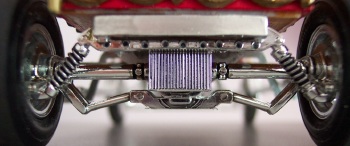
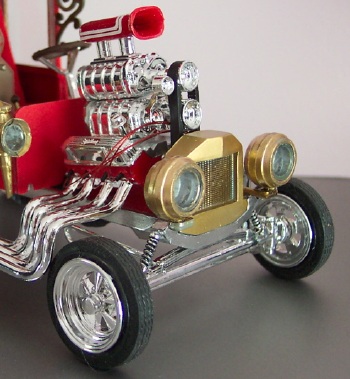
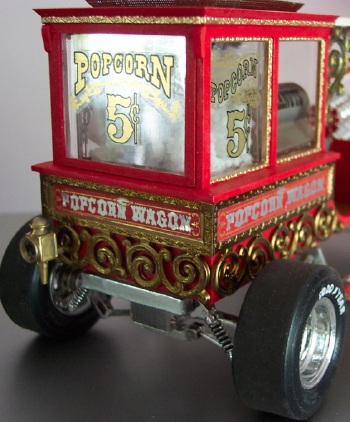
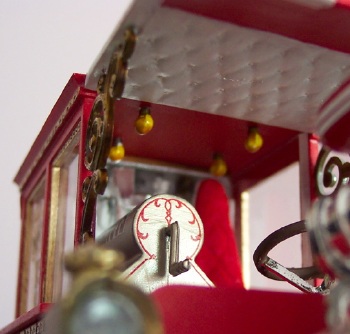
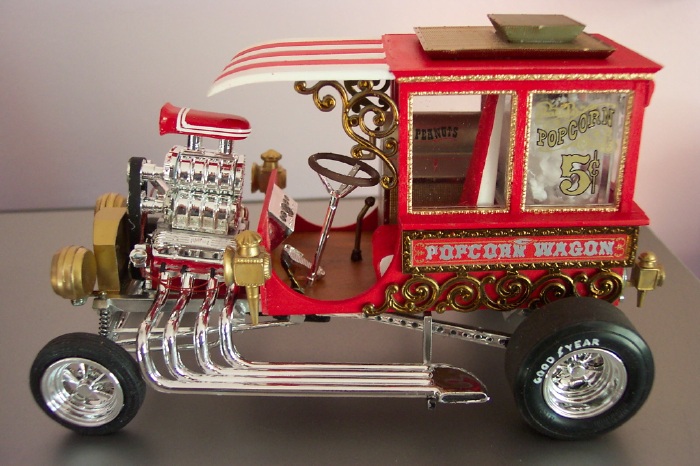
Built by: Mark Rollie of Crystal, MN The Popcorn Wagon has always been one of my very favorite showcars, ever since I first saw the MPC kit on the store shelf way back when. My allowance was pretty pitiful in those days, so I had to save for a few weeks in order to buy it (yes, my allowance was THAT pitiful). There was always something about the Carl Casper cars that really appealed to me a little more than the others, and the Popcorn Wagon is near perfection in my eyes. Several years ago I was surprised and overjoyed to see the AMT reissue and bought it immediately. I opened up the kit only to find AMT had replaced the original tires with molded plastic front tires and the wrong size vinyl tires for the rear. And the decals weren't the original designs either. Oh well ... the kit remained unbuilt in my closet stash, until we moved into our new home a couple of years ago, and when my model building suddenly took off again the Popcorn Wagon was brought back out. During assembly I discovered that the gold plating was really fouled up. It was dark in most areas, and other spots didn't have plating at all, just a gloss glaze. The radiator even had text in the finish!! This model was personal to me, so now there would be even more of an effort to do it right. I was searching after-market supply places for new tires but then AMT came to the rescue by reissuing the Chuck Wagon, which used many of the same parts as the PW including the correct tires. Slippery Arts rescued me from having to use the new decals. As for the gold plating, I left it as is for some pieces, such as the fancy ornamental work. For the peanut roaster, I masked off the grillwork to keep the plating and painted the rest Alclad Burnt Metal. The lights were painted with Alclad Pale Gold, with the headlights having a light coat of Testors Gold on top of that, along with silver on the inside. I masked off the grill for the radiator to keep the plating, and painted the rest Alclad Pale Gold as well. The suspension, drive train and axles were detailed with thinned flat black for the springs and Tamiya Smoke to bring out details without getting too 'heavy' on the black. I drilled out the holes in the link bars rather than use black paint in them for an extra touch of detail, and maybe testing my eyes to see if I could find other ways to punish them to squint at fine detail work. The floor, for a wood look, was painted Testors Flat Brown, with a light dry brushing of Tamiya Red Brown for grain. I used red flocking on the seat for that fuzzy super-comfy look. A neat added touch, not mentioned in the AMT instructions but a tip I remembered from the MPC instructions, was to grind up styrofoam for popcorn. It certainly looks cool, even though the process results in a big mess on my work table! My wife joked that I should have painted kernels on the Styrofoam, but ... that's just plain silly ... still ... Details on the engine include pin-striping on the scoop, done by tape and a couple of very tiny touches of white paint. The wiring was done by drilling holes into the block and cutting up small pieces of black tubing left over from a Revell 1/16th dragster kit. Wire filament was then threaded through the tubing at one end, and into the magneto at the other end. The body of the car was pretty simple ... Testors flat red brushed on by hand (the paint goes on very well), and then flat white for the canopy and gold for the trim around the windows. I really like how the different shades of gold on this kit really set each other off, one of those times when poor quality plating results in a 'happy accident' ... I think the kit looks much better than it would have if the plating had been done correctly! I always try to build each model with quality effort, but this was one of those cases where you give 110% for one reason or another. This one has always had a very special place in the ol' Hobby Heart, and it means a lot to me to have it back on my shelf again!
|
|
||
|
|
|||
